Milesight-Troubleshooting-Hardware Reset
Milesight-Troubleshooting-Hardware Reset.pdf

The following will introduce how to reset network Camera via hardware.
1. Position of Reset Button
Vandal-proof Mini Bullet Camera: open the back cover, you can use tools to achieve Reset like the figure shown below.
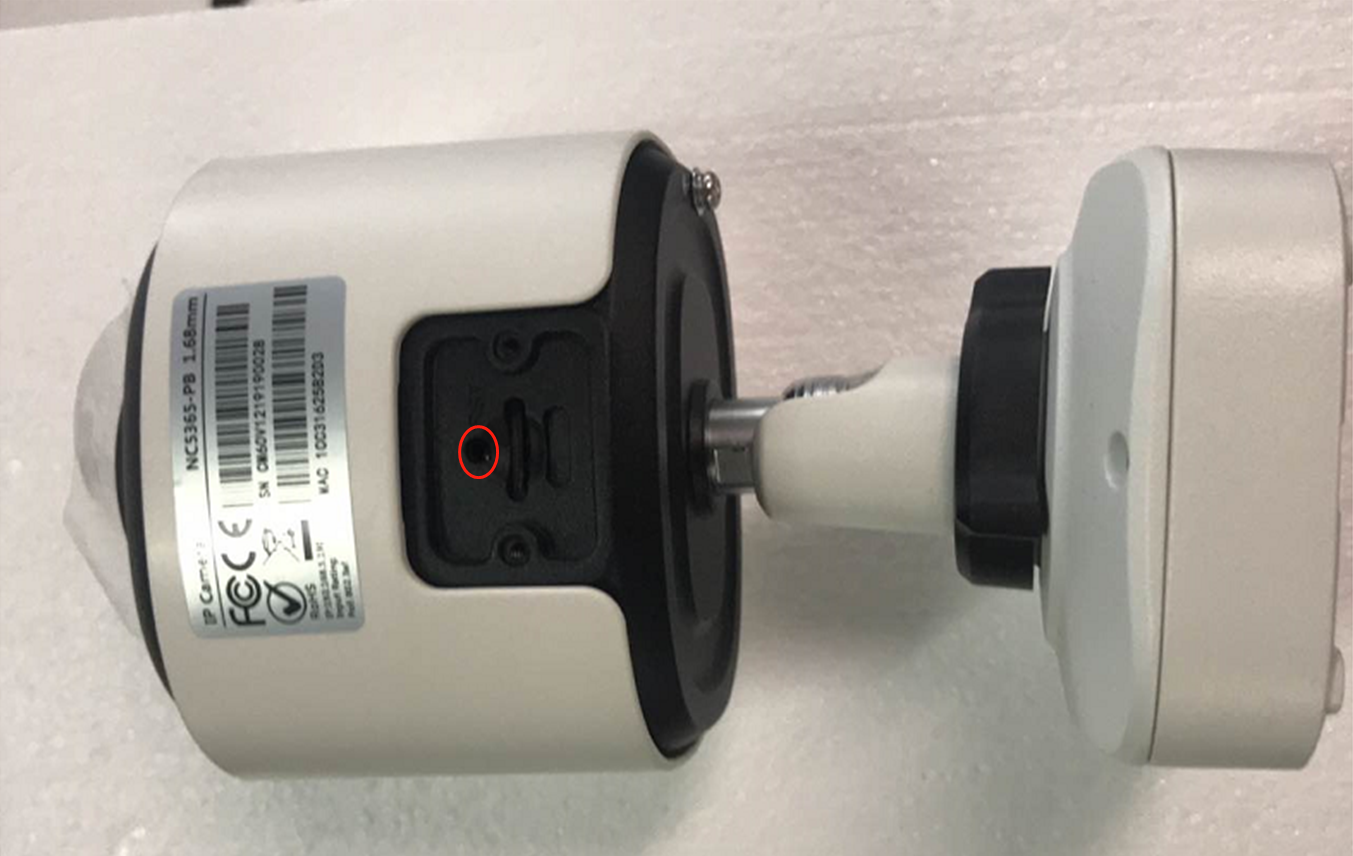
Mini Bullet Camera/Motorized Mini Bullet/Vandal-proof Motorized Mini Bullet: open the cover of the base, a black button like the figure shown below.
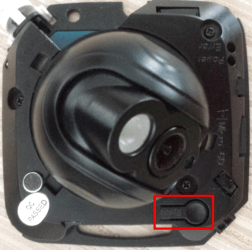
180° Panoramic Mini Bullet: open the back cover on the camera body, you can use tools to achieve reset button like the figure shown below.
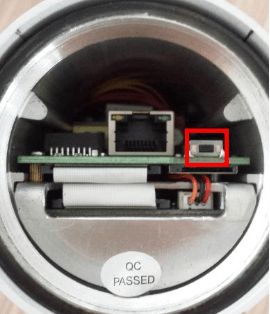
Pro Bullet Camera: open the back cover, a button like the figure shown below.
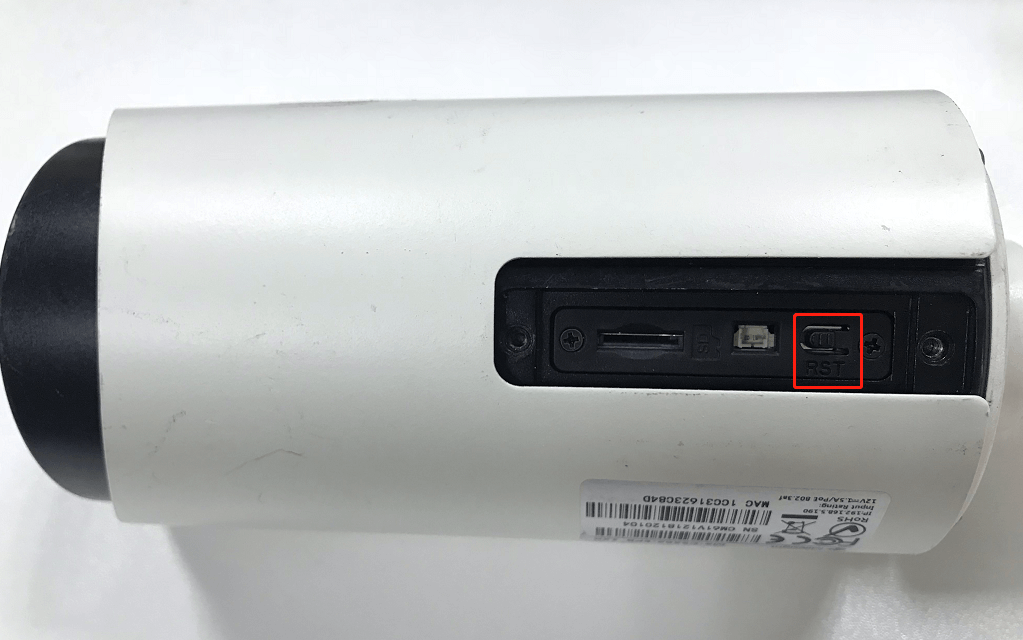
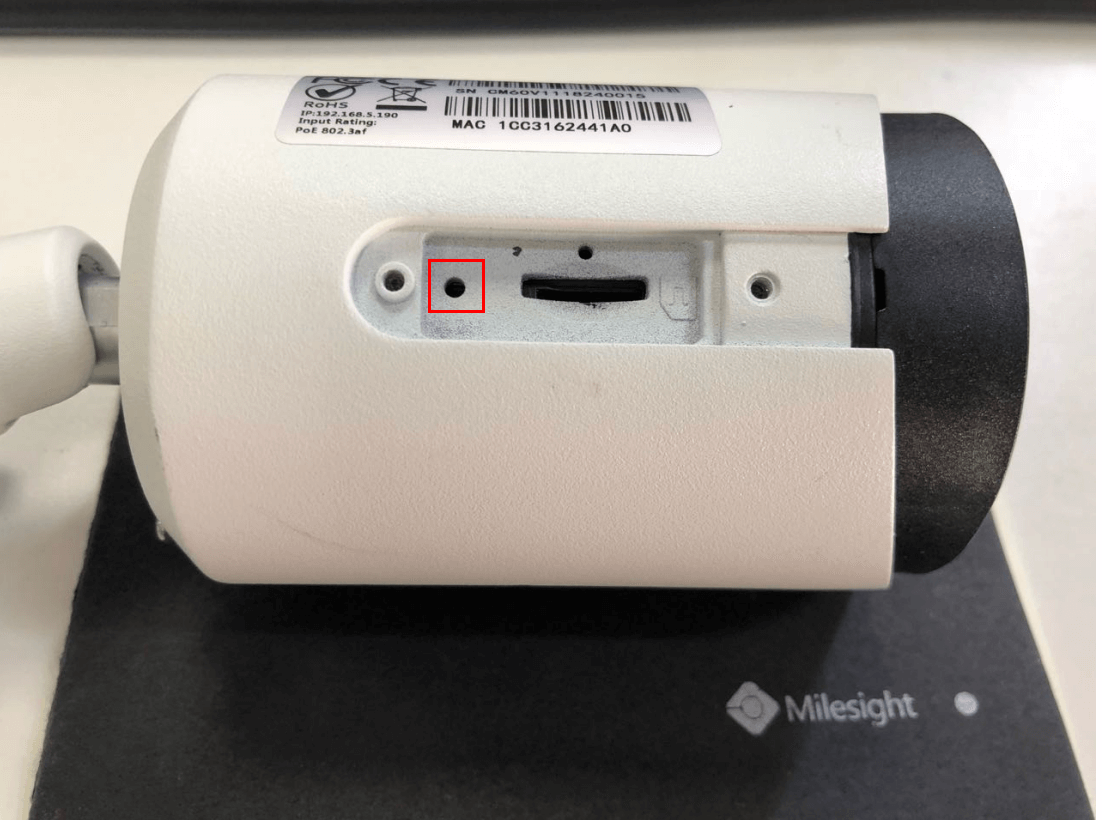
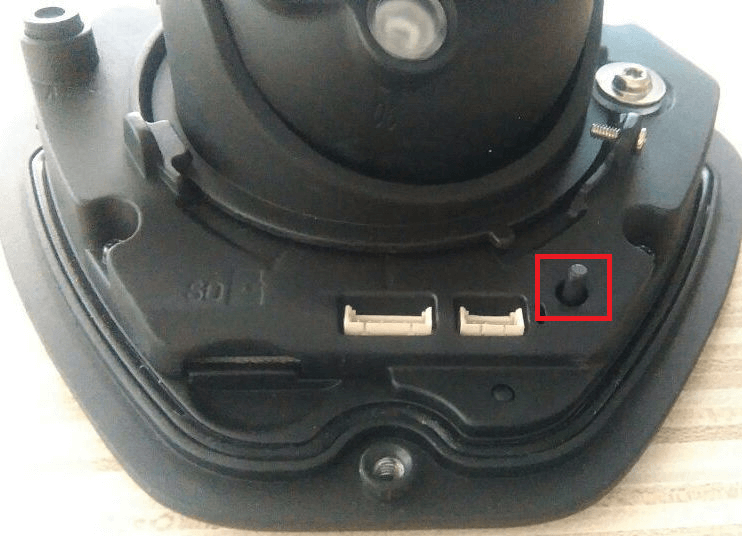
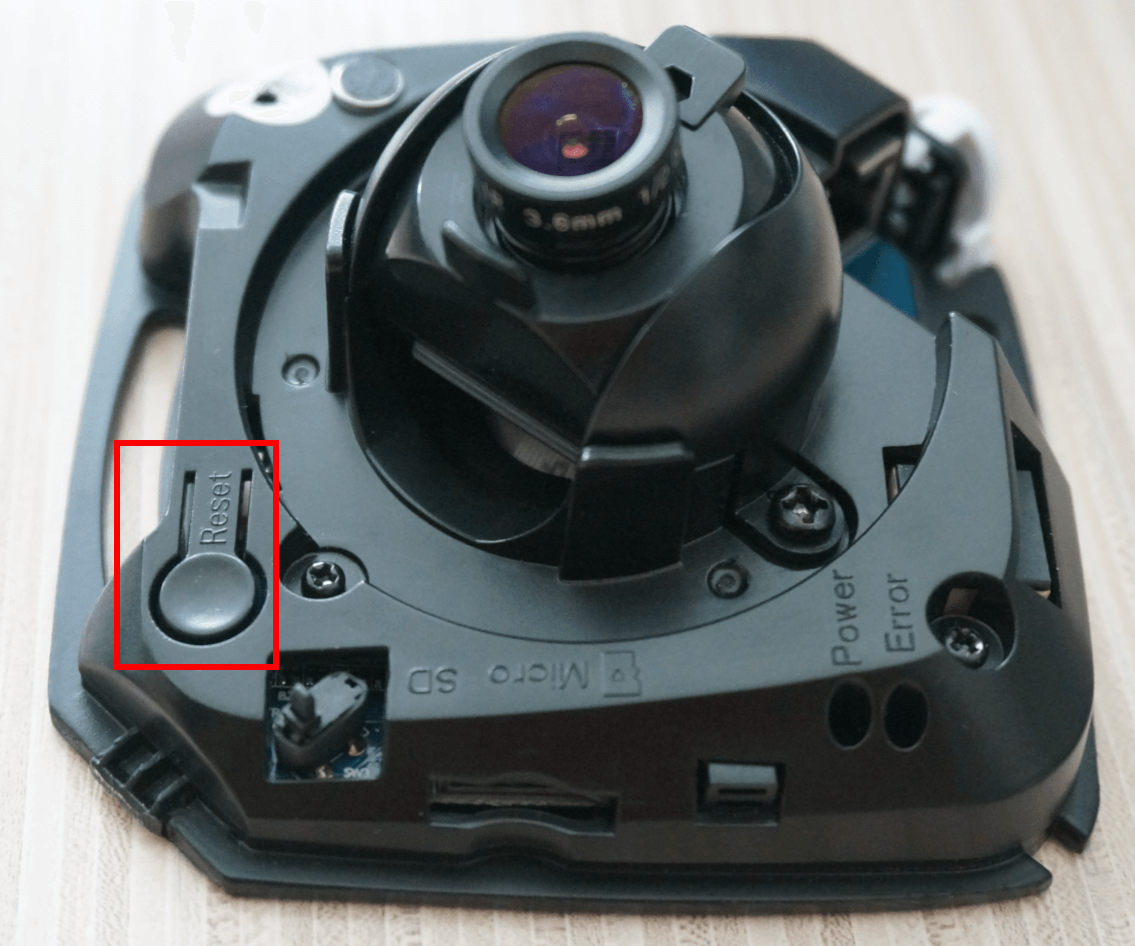
Mini (PoE) PTZ Bullet Camera: open the upper housing and the SD card cover which on the left side of the camera body, a button like the figure shown below.
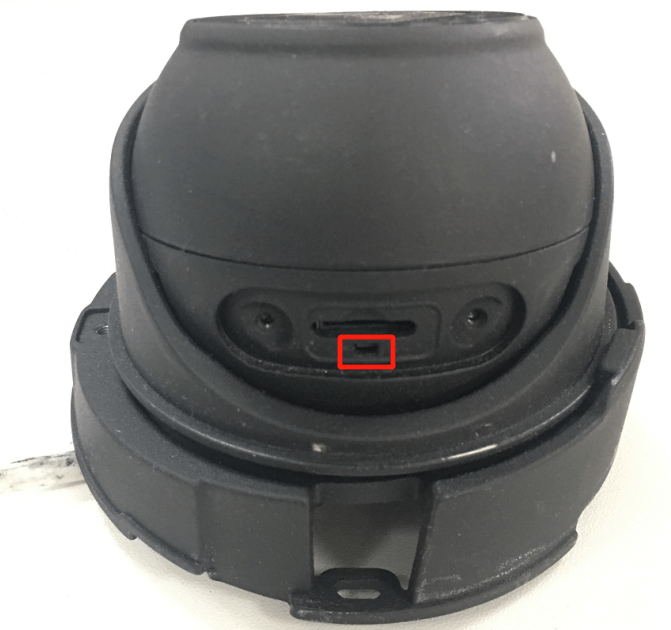
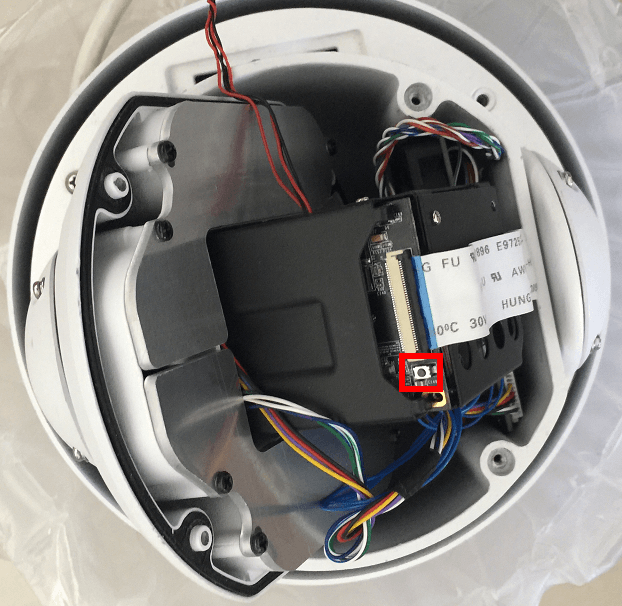
Weather-proof-Mini-Dome/AF-Motorized-Mini-Dome: open the back cover on the camera ball, you can use tools to achieve reset button like the figure shown below.
IR Mini Dome Camera: open the cover, a button like the figure shown below.
IR Mini Dome Camera Ⅱ: open the cover, a button like the figure shown below.
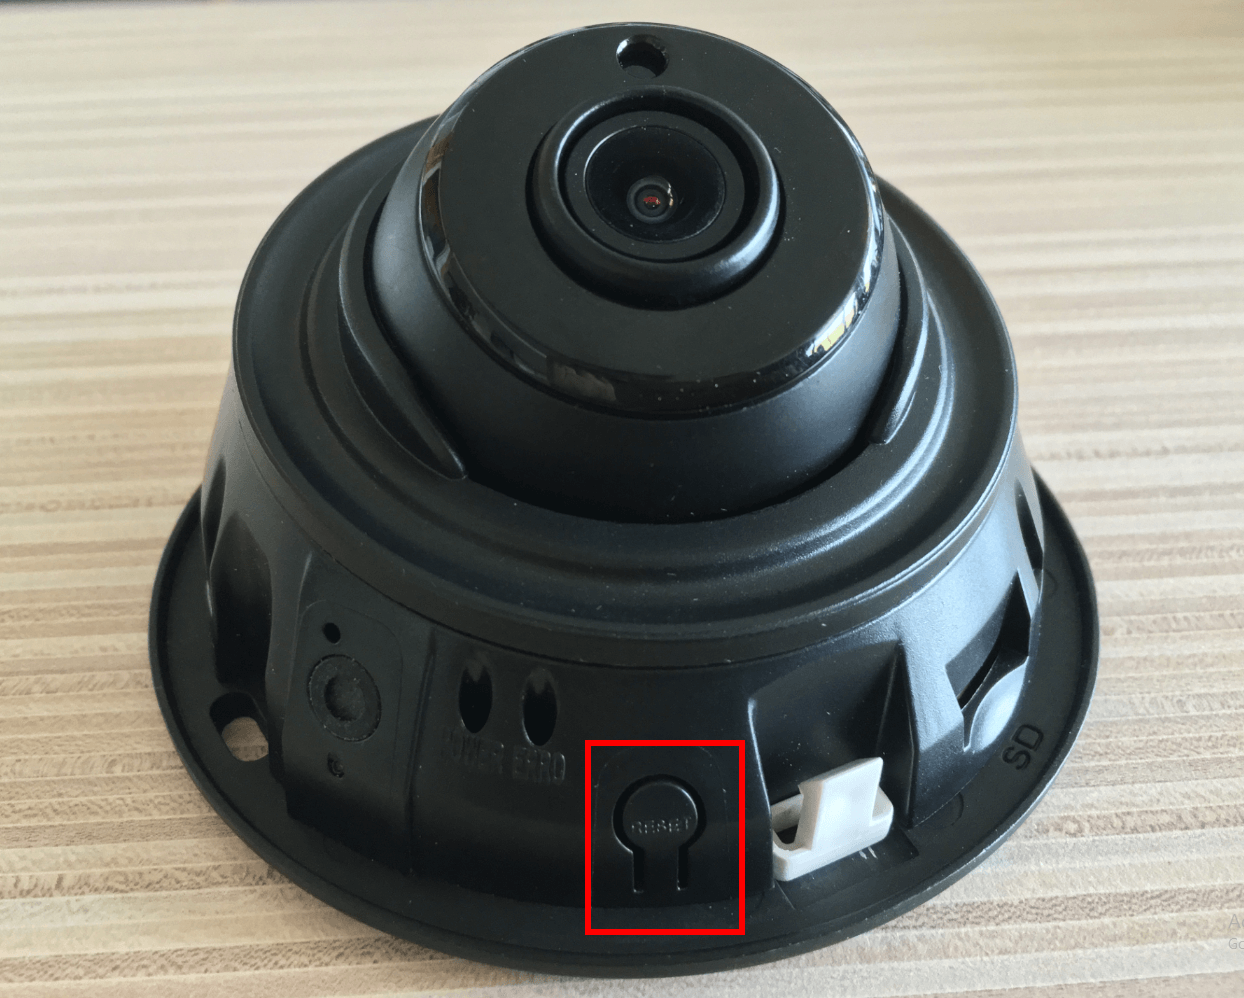
Vandal-proof Mini Dome Camera: open the cover, a button like the figure shown below.
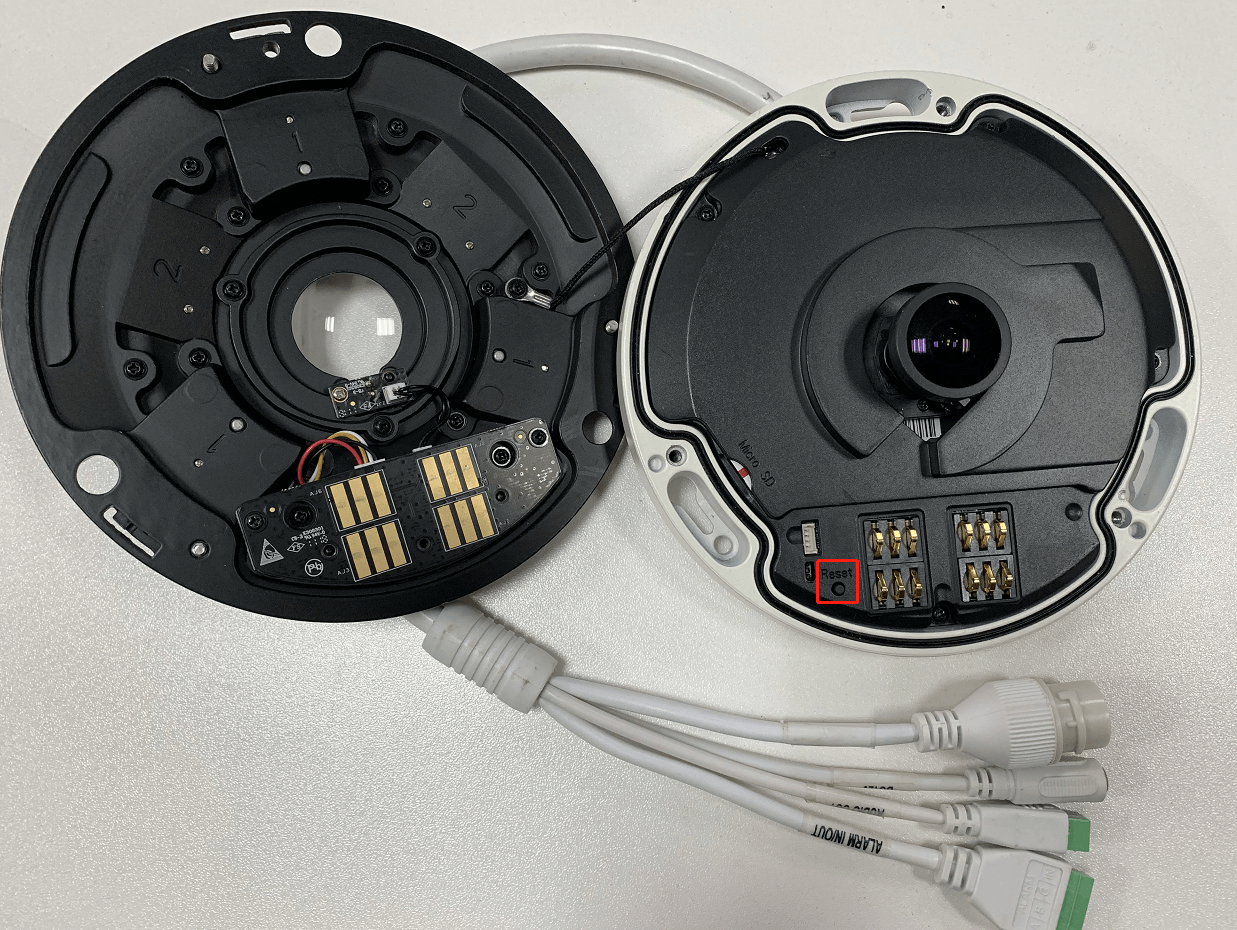
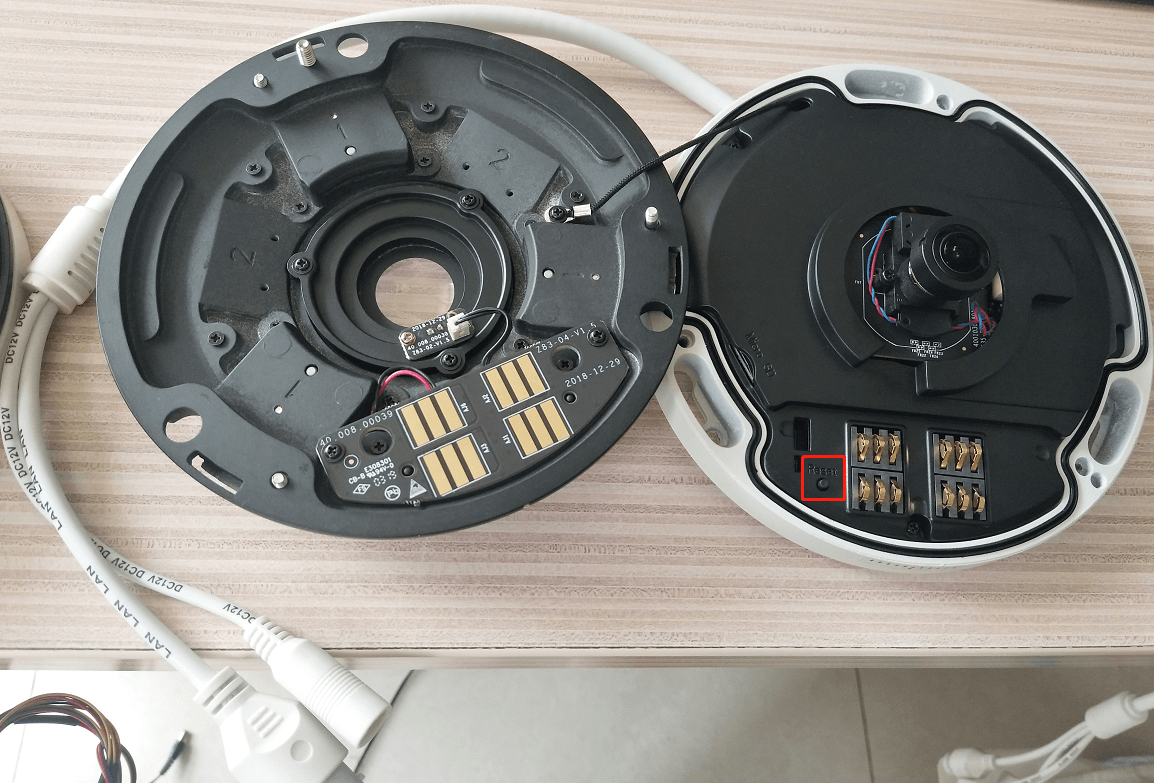
Pro Dome Camera: open the top lid cover, you can use tools to achieve Reset like the figure shown below.
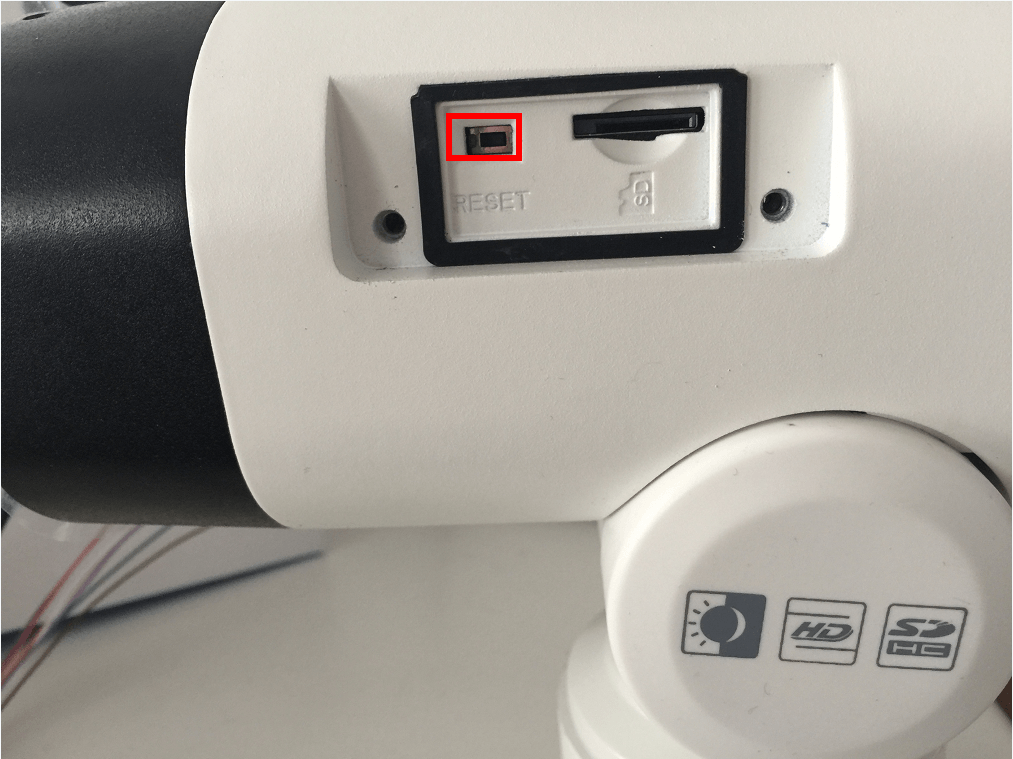
Mini PTZ Dome Camera: open the dome cover and SD card cover, a black button next to SD card slot like the figure shown below.
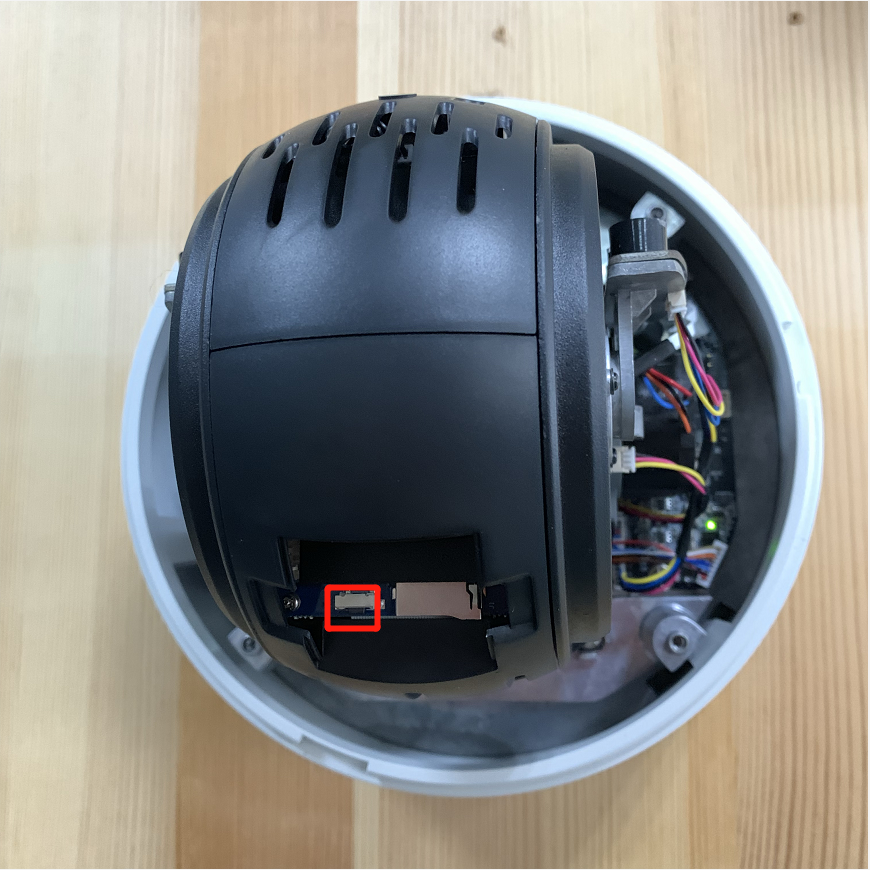
Speed Dome Camera: Open the front cover, a black button like the figure shown below.
Fisheye Camera: Open the front cover, a black button like the figure shown below.
MS-C9674-PB:
MS-C5374-PB:
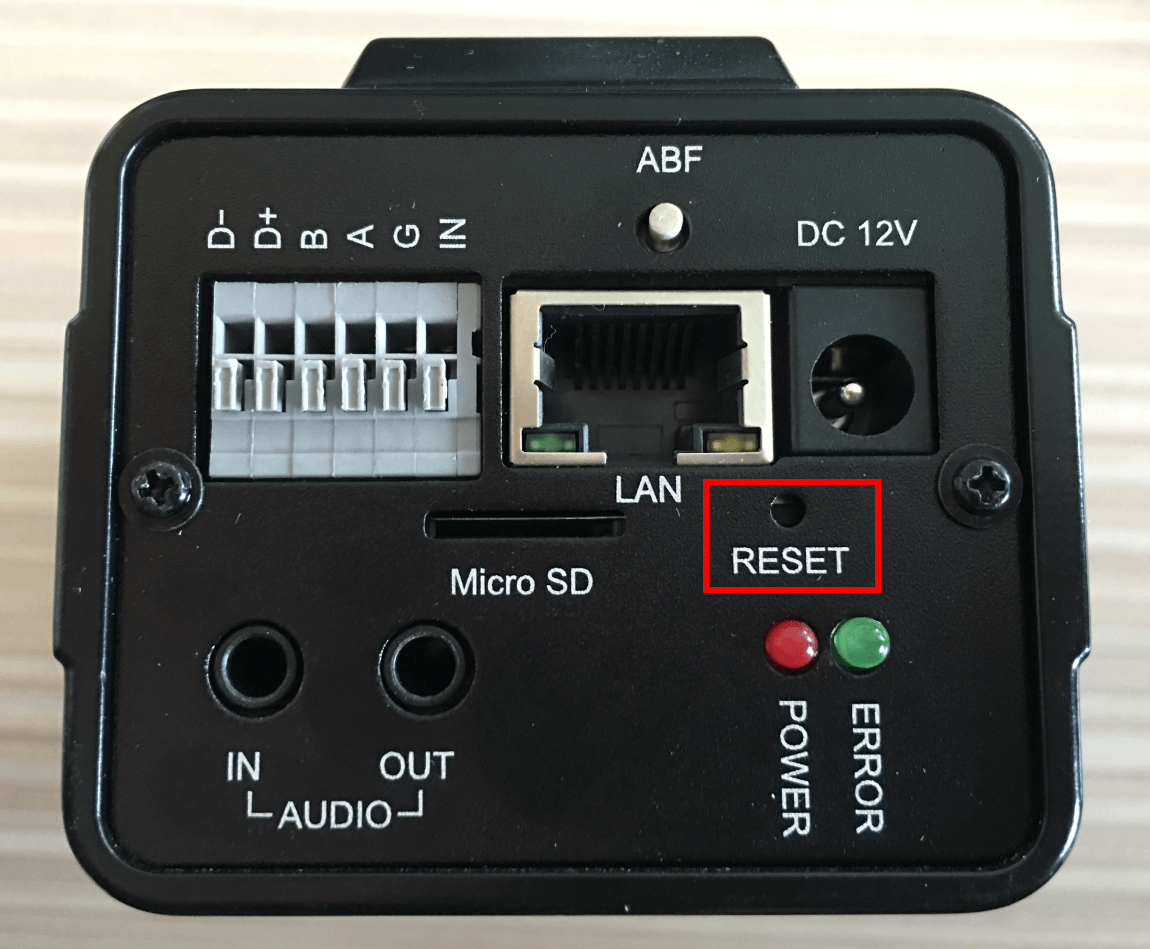
Pro Box: a hole on the back, use pin or something like that to push the button deeper inside the hole.
Mini Dome Camera: open the cover, a button like the figure shown below.
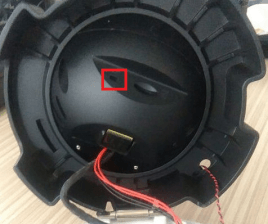
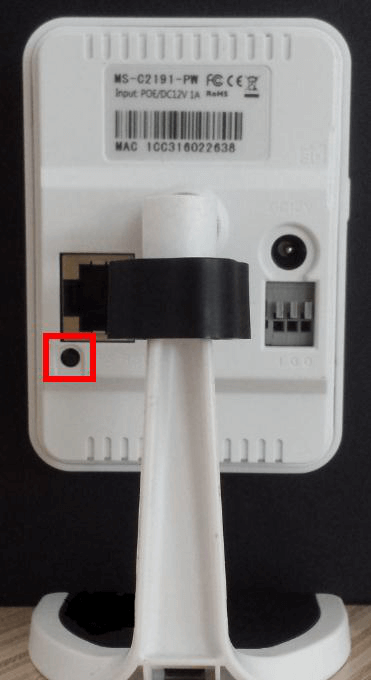
Wi-Fi Mini Cube Camera: a black button on the back.
2. Reset Steps
For cameras whose model suffix has -A or -B (Like MS-C3377-PNA, MS-C4463-FIPB) with the software version is before xx.6.0.56
Step1: Power on the network camera and wait 2 minutes when it is totally up;
Step2: Press the reset button for over 5~10s,until hear the voice of IR-cut and see the IR LEDs are always on;
Step3: It will take 1~3 minutes to complete the reset and the IP will turn into 192.168.5.190 (If the IP does not be changed into 192.168.5.190, please try again from step 1.);
Step4: Modify your local IP by SmartTools again.
For cameras whose model suffix has -A or -B (Like MS-C3377-PNA, MS-C4463-FIPB) with the software version is after xx.6.0.56
Step1: Press the reset button and hold on, then power on the network camera and the IR LEDs will begin to twinkle ;
Step2: (Only for model -A) Keep pressing until the LEDs stop twinkle; (Only for model -B) Keep pressing the reset button until the IR LEDs stay always on;
Step3: Loosen the reset button, then the camera begin to reset;
Step4: It will take 1~3 minutes to complete the reset and the IP will turn into 192.168.5.190 (If the IP does not be changed into 192.168.5.190, please try again from step 1.);
Step5: Modify your local IP by SmartTools again.
For other cameras whose model suffix has no -A nor -B: (Like MS-C2182-P)
Step1: Press the reset button before powering on the network camera (do not loosen);
Step2: Power on the network camera and keep pressing the reset button for 10s;
Step3: It will take 1~3 minutes to complete the reset and the IP will turn into 192.168.5.190 (If the IP does not be changed into 192.168.5.190, please try again from step 1.);
Step4: Modify your local IP by SmartTools again.